Cut your heating bills - Cleansing your system
Many of the tips we’ll be offering are things that many householders / bill payers can do themselves, or get a family member to do, without needing to call out a plumber.
The black sludge that forms inside your pipework and radiators can cause a considerable amount of extra gas to be used.
Quite apart from hindering the flow of water from your boiler to your radiators, thereby making the system work harder, this sludge can also cause blockages and increase the possibility of an expensive breakdown.
Many heating engineers can offer a service known as power flushing to clean your system, and although power flushing is pretty thorough, it can also be quite expensive.
The good news is that there is something you can do yourself to help combat the sludge issue.
(Before starting this procedure, make a note of which pipe to each radiator is the Flow and which is the Return. You can do this by switching on your heating from cold, and noting which pipe heats up soonest on each radiator. The pipe that gets hot the quickest is the Flow, the other pipe is the Return.)
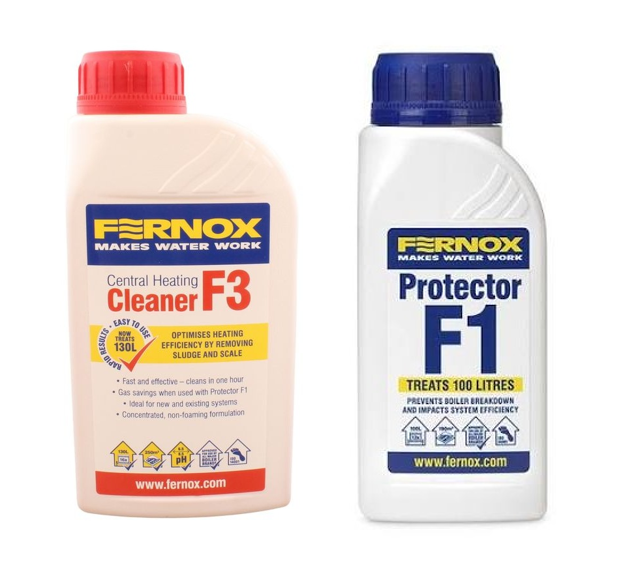
Most DIY stores and plumber’s merchants sell heating system cleaner. Well known brands might cost around £15 to £20 for a 1 litre bottle, while store own brands are generally around half that price. One bottle is usually enough for a heating system of up to 8 to 10 radiators.
It is worth asking the retailer before you buy, that you’re choosing a cleaner that can be left in the system for a few weeks, not just a few hours.
To dose your system, make sure the boiler is switched off. Turn off the power supply to the boiler. This is normally a switch on the wall, either near your boiler or it may be on the kitchen wall if you live in a newer house.
Attach a hosepipe to the drain point on your system and drain down until water stops running freely. At this point, using a vent key (bleed key) open a couple of bleed pips on upstairs radiators to let air in. This will allow more water to leave the system.
Once you have drained the upstairs heating circuit, its time to add the cleaning fluid.
If you have a towel rail type of radiator in the bathroom, this makes life easier.
IF YOU DON’T HAVE A TOWEL RAIL, SEND US A MESSAGE AND WE’LL SEND YOU THE METHOD.
Close the drain off valve downstairs.
Remove a core plug from the top of the towel rail (you’ll need an adjustable spanner)
Carefully pour the cleaning fluid into the towel rail.
Replace the core plug and tighten up.
Check and re tighten any vent (bleed) pips in the radiators you have worked on.
Refill the system (assuming you have a combi boiler or a system boiler, use the same method as you’d use to top up pressure)
IF YOU HAVE A TRADITIONAL SYSTEM WITH A HEADER TANK, MESSAGE US AND WE’LL SEND YOU APPROPRIATE GUIDANCE NOTES
Once pressure is at 1 bar to 1.5 bar, close the filling link and leave the system to stand.
This is called a Standing Pressure Test.
Go and have a cuppa. If, after your cuppa, the pressure is exactly where you left it, it means you fully tightened the drain point and the core plug. If the pressure has dropped, check tightness, top the boiler back up to the previous level and repeat the standing pressure test.
Once you’re happy that everything is watertight, start bleeding (venting) your radiators. Start downstairs and work your way upstairs.
After venting each radiator, top up the system pressure as it will have fallen.
Once all radiators have been vented, set the pressure to anywhere between 1bar and 1.5 bar.
Now switch on your heating and run it for an hour or two to push the cleaning fluid right around the system.
Over the next couple of weeks or so, use your heating as normal.
After a few weeks, choose a fairly mild, dry day to flush your system. You’ll have the heating switched off for a couple of hours or so, and the door will be open with a hosepipe running to outside. Obviously it makes sense to pick your day for this part of the job.
Open all radiator valves (both sides of each radiator) so they are full open.
Attach a hosepipe to the drain point on your system but don’t open it yet.
Run your heating at full tilt. Turn up the temperature on the boiler control, and turn up your room thermostat. This is to cause your heating to stay on as much as possible.
Gently tap along the bottom of each radiator. The shaft of a hammer that has a rubber grip is ideal for this. Tapping will cause some vibration, that in turn will dislodge some of the oxide sludge that has stuck to the bottom of the radiators.
Once you have gone around and tapped all radiators, go round again.
Now turn off the boiler.
Open the drain valve to allow water to flush out. Stay near to the drain point to make sure the hose doesn’t pop off.
Once water stops flowing through the hose, close the drain point.
Now refill the system, following the steps from above.
Once the system is full and vented, turn on the boiler.
Let the system heat up and run for a few minutes.
Once again, go around the radiators tapping along the bottom.
Again, switch off the boiler, open the drain point and empty the system.
Repeat this process of refilling, venting, running the system, tapping, and then emptying as many times as your day allows. Each time, you’ll remove a bit more crud from the system. So, if you can, repeat the process at least 3 or 4 times.
Now you’re ready to refill the system.
Close off the drain point, but leave the hosepipe in place (just in case)
Add a bottle of corrosion inhibitor to the system. (Again, a few pounds from a DIY store or plumber’s merchant) Adding inhibitor will help reduce the formation of more sludge in the future.
To add the inhibitor, follow the same steps as you followed to add the cleaning fluid.
To refill and vent the system, follow the same steps you followed when adding the cleaning fluid.
Switch the boiler back on and run for an hour or so to distribute the inhibitor all around the system.
Now you need to reset the radiator valves to their correct position.
With all radiators, adjust the radiator valve on the Return end so that is open around a half turn to three-quarters of a turn. Do this by closing it down fully, then slowly opening it back up to the desired setting.
The valves on the Flow end of each radiator should be set as follows:
Downstairs radiators closed down and then reopened two and a half turns, upstairs radiators open one and a half turns.
Leave to run for an hour.
Check that all radiators are hot and rooms are sufficiently warm.
Make small adjustments to radiator valves if any are needed.
If there are any rooms that are not in regular use, such as a spare bedroom, you can nip the Flow side radiator valve down a little more to reduce flow to that radiator and thereby save fuel costs.
Share with someone who might find this helpful